
Bleeds are important to add to your print files to ensure that artwork extends to the edge of the printed piece. Printers cannot print to the edge of a piece of paper so bleeds are created so that printing is done on a large sheet which is then cut so that the artwork extends to the edge of the piece.
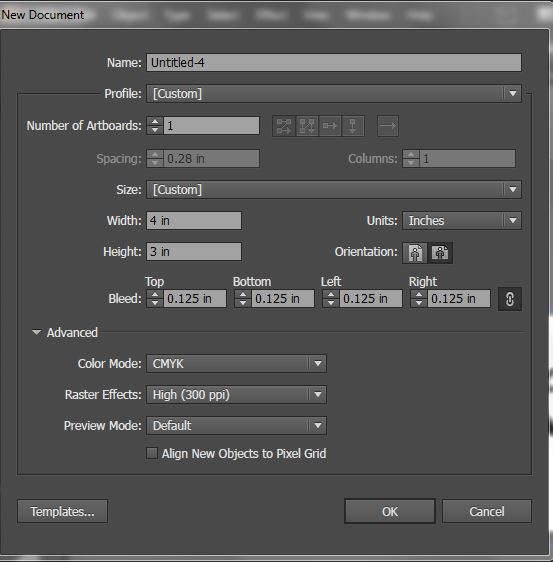
To setup your artwork with bleeds you will need to add the bleeds to the document when creating the document. Typically it is best to add a 0.125" bleed to all sides. This can be done in the new document screen as seen below.
It is important that you do not include any artwork that you do not want cut of in the bleed area. It is also recommended that you leave a 0.125" buffer from the edge of the piece to the further ensure that no important text or images get trimmed. You will see a white space which indicates the finished size of the piece and then a red line which shows the edge of the bleed. All artwork that is not to be trimmed should be included in the white space.

Once you have created your design you will then need to save the file to a PDF bleeds. On the save menu select Marks and Bleeds. It is helpful to select Trim Marks (though we can add them after). You will also need to ensure that the bleeds are exported. If you have setup bleeds in the document it is best to select Use Document Bleed Settings. If you have not then you can add the bleeds here, just make sure that your artwork extends past the edge of the finished size.

Including bleeds in the creation of your artwork will help ensure that printing is setup correctly and that your artwork will not need to be manipulated to ensure that bleeds are included. Bleeds are essential if you want your artwork to extend all the way to the edge of the piece.